.net core Ocelot Consul 实现API网关 服务注册 服务发现 负载均衡
大神张善友 分享过一篇 [《.NET Core 在腾讯财付通的企业级应用开发实践》](http://mp.weixin.qq.com/s?__biz=MzAwNTMxMzg1MA==&mid=2654069421&idx=1&sn=83a964970183233b0c5051194ebe6c50&chksm=80dbc6f8b7ac4feefd167fefb50cf55126cabf59090d0f99852ca1c928abf0e53d603c0a73c6&scene=21#wechat_redirect)里面就是用.net core 和 Ocelot搭建的可扩展的高性能Api网关。
Ocelot([http://ocelot.readthedocs.io](http://ocelot.readthedocs.io))是一个用.NET Core实现并且开源的API网关,它功能强大,包括了:路由、负载均衡、请求聚合、认证、鉴权、限流熔断等,这些功能只都只需要简单的配置即可完成。
Consul([https://www.consul.io](https://www.consul.io))是一个分布式,高可用、支持多数据中心的服务注册、发现、健康检查和配置共享的服务软件,由 HashiCorp 公司用 Go 语言开发。
Ocelot天生集成对Consul支持,在OcelotGateway项目中Ocelot.json配置就可以开启ocelot+consul的组合使用,实现服务注册、服务发现、健康检查、负载均衡。
软件版本
Asp.net Core:2.0
Ocelot:7.1.0-unstable0011(开发时最新)
Consul:1.1.0(开发时最新)
#### 项目结构 ####
Snai.Ocelot 网关:
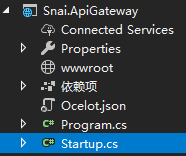
Snai.ApiGateway Asp.net Core 2.0 Api网关
Snai.ApiServiceA Asp.net Core 2.0 Api下游服务A
Snai.ApiServiceB Asp.net Core 2.0 Api下游服务B
ApiServiceA和ApiServiceB其实是一样的,用于负载,为了测试方便,我建了两个项目

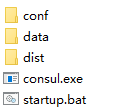
Consul:
conf 配置目录
data 缓存数据目录,可清空里面内容
dist Consul UI目录
consul.exe 注册软件
startup.bat 执行脚本

#### 项目实现 ####
**一、基于Ocelot搭建Api网关**
新建Snai.Ocelot解决方案
1、搭建Api网关
新建 Snai.ApiGateway 基于Asp.net Core 2.0空网站,在 依赖项 右击 管理NuGet程序包 浏览 找到 Ocelot 版本7.1.0-unstable0011安装
1.1、在项目根目录下新建一个 Ocelot.json 文件,打开 Ocelot.json 文件,配置Ocelot参数,Ocelot.json 代码如下:
```
{
"ReRoutes": [
{
"UpstreamPathTemplate": "/apiservice/{controller}",
"UpstreamHttpMethod": [ "Get" ],
"DownstreamPathTemplate": "/apiservice/{controller}",
"DownstreamScheme": "http",
"DownstreamHostAndPorts": [
{
"host": "localhost",
"port": 5011
},
{
"host": "localhost",
"port": 5012
}
],
"LoadBalancerOptions": {
"Type": "LeastConnection"
}
}
],
"GlobalConfiguration": {
"BaseUrl": "http://localhost:5000"
}
}
```
如果有多个下游服务,把ReRoutes下 {...} 复制多份,最终如: "ReRoutes":[{...},{...}]
Ocelot参数说明如下,详情查看官网([http://ocelot.readthedocs.io](http://ocelot.readthedocs.io))
ReRoutes 路由配置
UpstreamPathTemplate 请求路径模板
UpstreamHttpMethod 请求方法数组
DownstreamPathTemplate 下游请求地址模板
DownstreamScheme 请求协议,目前应该是支持http和https
DownstreamHostAndPorts 下游地址和端口
LoadBalancerOptions 负载均衡 RoundRobin(轮询)/LeastConnection(最少连接数)/CookieStickySessions(相同的Sessions或Cookie发往同一个地址)/NoLoadBalancer(不使用负载)
DownstreamHostAndPorts配了两个localhost 5011和localhost 5012用于负载均衡,负载均衡已经可以了,但没有健康检查,当其中一个挂了,负载可能还是会访问这样就会报错,所以我们要加入Consul,我们稍后再讲。
请求聚合,认证,限流,熔错告警等查看官方配置说明
GlobalConfiguration 全局配置
BaseUrl 告诉别人网关对外暴露的域名
1.2、修改 Program.cs 代码,读取Ocelot.json配置,修改网关地址为 http://localhost:5000

代码如下:
```
using System;
using System.Collections.Generic;
using System.IO;
using System.Linq;
using System.Threading.Tasks;
using Microsoft.AspNetCore;
using Microsoft.AspNetCore.Hosting;
using Microsoft.Extensions.Configuration;
using Microsoft.Extensions.Logging;
namespace Snai.ApiGateway
{
public class Program
{
public static void Main(string[] args)
{
BuildWebHost(args).Run();
}
public static IWebHost BuildWebHost(string[] args) =>
WebHost.CreateDefaultBuilder(args)
.ConfigureAppConfiguration((context, builder) => {
builder.SetBasePath(context.HostingEnvironment.ContentRootPath)
.AddJsonFile("Ocelot.json");
})
.UseUrls("http://localhost:5000")
.UseStartup<Startup>()
.Build();
}
}
```
1.3、修改Startup.cs代码,注入Ocelot到容器,并使用Ocelot
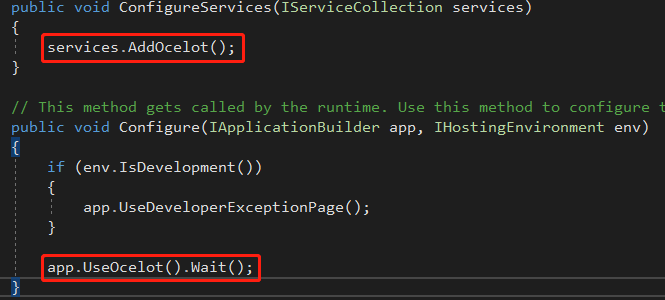
代码如下:
```
using System;
using System.Collections.Generic;
using System.Linq;
using System.Threading.Tasks;
using Microsoft.AspNetCore.Builder;
using Microsoft.AspNetCore.Hosting;
using Microsoft.AspNetCore.Http;
using Microsoft.Extensions.DependencyInjection;
using Ocelot.DependencyInjection;
using Ocelot.Middleware;
namespace Snai.ApiGateway
{
public class Startup
{
// This method gets called by the runtime. Use this method to add services to the container.
// For more information on how to configure your application, visit https://go.microsoft.com/fwlink/?LinkID=398940
public void ConfigureServices(IServiceCollection services)
{
services.AddOcelot();
}
// This method gets called by the runtime. Use this method to configure the HTTP request pipeline.
public void Configure(IApplicationBuilder app, IHostingEnvironment env)
{
if (env.IsDevelopment())
{
app.UseDeveloperExceptionPage();
}
app.UseOcelot().Wait();
}
}
}
```
最终项目结构如下:
2、搭建服务Snai.ApiServiceA,Snai.ApiServiceB
新建 Snai.ApiServiceA 基于Asp.net Core 2.0 Api网站
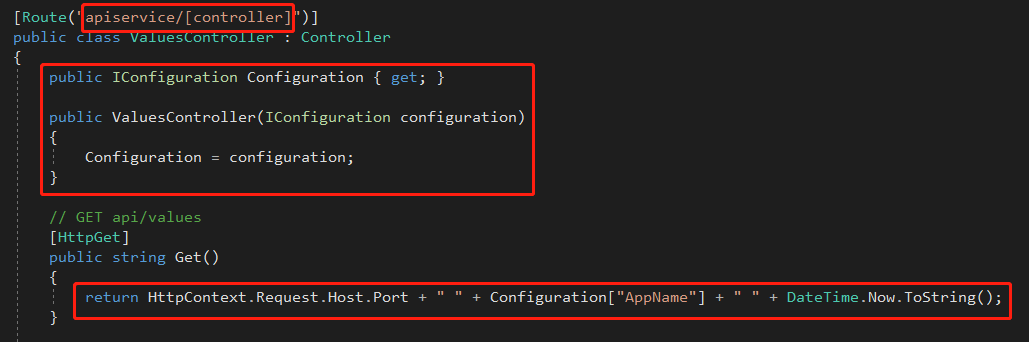
2.1、修改Controllers/ValuesController.cs代码
修改路由为Ocelot 配置的下游地址 apiservice/[controller],注入appsettings.json配置实体,修改Get方法为返回读取配置内容,其他方法可以删除
代码如下:
```
using System;
using System.Collections.Generic;
using System.Linq;
using System.Threading.Tasks;
using Microsoft.AspNetCore.Mvc;
using Microsoft.Extensions.Configuration;
namespace Snai.ApiServiceA.Controllers
{
[Route("apiservice/[controller]")]
public class ValuesController : Controller
{
public IConfiguration Configuration { get; }
public ValuesController(IConfiguration configuration)
{
Configuration = configuration;
}
// GET api/values
[HttpGet]
public string Get()
{
return HttpContext.Request.Host.Port + " " + Configuration["AppName"] + " " + DateTime.Now.ToString();
}
}
}
```
2.2、修改appsettings.json配置,加入 "AppName": "ServiceA"
```
{
"Logging": {
"IncludeScopes": false,
"Debug": {
"LogLevel": {
"Default": "Warning"
}
},
"Console": {
"LogLevel": {
"Default": "Warning"
}
}
},
"AppName": "ServiceA"
}
```
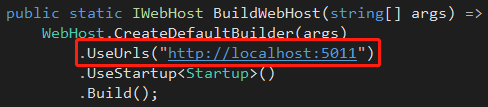
2.3、修改Program.cs代码,修改该服务地址为 http://localhost:5011
```
using System;
using System.Collections.Generic;
using System.IO;
using System.Linq;
using System.Threading.Tasks;
using Microsoft.AspNetCore;
using Microsoft.AspNetCore.Hosting;
using Microsoft.Extensions.Configuration;
using Microsoft.Extensions.Logging;
namespace Snai.ApiServiceA
{
public class Program
{
public static void Main(string[] args)
{
BuildWebHost(args).Run();
}
public static IWebHost BuildWebHost(string[] args) =>
WebHost.CreateDefaultBuilder(args)
.UseUrls("http://localhost:5011")
.UseStartup<Startup>()
.Build();
}
}
```
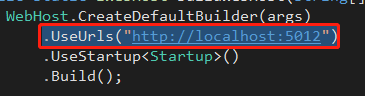
2.4、新建 Snai.ApiServiceB 基于Asp.net Core 2.0 Api网站,几乎与Snai.ApiServiceA一样,除了 "AppName": "ServiceB",.UseUrls("http://localhost:5012")
到此 基于Ocelot Api网关 搭建完成
3、启动 运行 Snai.ApiServiceA,Snai.ApiServiceB,Snai.ApiGateway项目,在浏览器打开 http://localhost:5000/apiservice/values 地址
刷新页面负载得到ServiceA,ServiceB返回内容。


Ocelot已内置负载均衡,但没有健康检查,不能踢除坏掉的服务,所以加入Consul,Consul提供服务注册发现、健康检查,配合Ocelot负载就能发现坏掉的服务,只负载到正常的服务上,下面介绍加入Consul。
**二、在Ocelot网关加入Consul,实现服务注册发现、健康检查**
1、启动Consul,开启服务注册、服务发现
首先下载Consul:https://www.consul.io/downloads.html,本项目是windows下进行测试,得到consul.exe
再下载Consul配置文件和Consul UI(配置文件适合本例Demo的,可根据具体项目修改调整):https://github.com/Liu-Alan/Ocelot-Consul/tree/master/Consul
conf:配置文件目录
data:缓存数据目录,可清空里面内容
dist:Consul UI,用于浏览器查看注册的服务情况;如果用Consul默认自带UI,该目录可以删除,Consul 启动脚本 -ui-dir ./dist 改为 -ui
Consul支持配置文件和Api两种方式服务注册、服务发现,下面主要讲解配置文件方式
Consul 配置文件service.json配置如下:
```
{
"encrypt": "7TnJPB4lKtjEcCWWjN6jSA==",
"services": [
{
"id": "ApiServiceA",
"name": "ApiService",
"tags": [ "ApiServiceA" ],
"address": "localhost",
"port": 5011,
"checks": [
{
"id": "ApiServiceA_Check",
"name": "ApiServiceA_Check",
"http": "http://localhost:5011/health",
"interval": "10s",
"tls_skip_verify": false,
"method": "GET",
"timeout": "1s"
}
]
},
{
"id": "ApiServiceB",
"name": "ApiService",
"tags": [ "ApiServiceB" ],
"address": "localhost",
"port": 5012,
"checks": [
{
"id": "ApiServiceB_Check",
"name": "ApiServiceB_Check",
"http": "http://localhost:5012/health",
"interval": "10s",
"tls_skip_verify": false,
"method": "GET",
"timeout": "1s"
}
]
}
]
}
```
两个服务ApiServiceA和ApiServiceB,跟着两个健康检查ApiServiceA_Check和ApiServiceB_Check
由于ApiServiceA和ApiServiceB做负载均衡,现在 "name": "ApiService" 配置一样
修改Snai.ApiServiceA、Snai.ApiServiceB项目 加入health 健康检查地址
打开ValuesController.cs 加入 health

代码如下:
```
using System;
using System.Collections.Generic;
using System.Linq;
using System.Threading.Tasks;
using Microsoft.AspNetCore.Mvc;
using Microsoft.Extensions.Configuration;
namespace Snai.ApiServiceA.Controllers
{
[Route("apiservice/[controller]")]
public class ValuesController : Controller
{
public IConfiguration Configuration { get; }
public ValuesController(IConfiguration configuration)
{
Configuration = configuration;
}
// GET api/values
[HttpGet]
public string Get()
{
return HttpContext.Request.Host.Port + " " + Configuration["AppName"] + " " + DateTime.Now.ToString();
}
[HttpGet("/health")]
public IActionResult Heathle()
{
return Ok();
}
}
}
```
重新生成运行项目Snai.ApiServiceA、Snai.ApiServiceB
清除Consul/data 内容,新建startup.bat文件,输入下面代码,双击启动Consul,本项目测试时一台机器,所以把 本机IP 改成 127.0.0.1
```
consul agent -server -datacenter=dc1 -bootstrap -data-dir ./data -config-file ./conf -ui-dir ./dist -node=n1 -bind 本机IP -client=0.0.0.0
```
再在Consul目录下启动另一个cmd命令行窗口,输入命令:consul operator raft list-peers 查看状态查看状态,结果如下:

打开Consul UI:http://localhost:8500 查看服务情况,可以看到ApiServiceA、ApiServiceB 服务,且健康检查都是正常的。
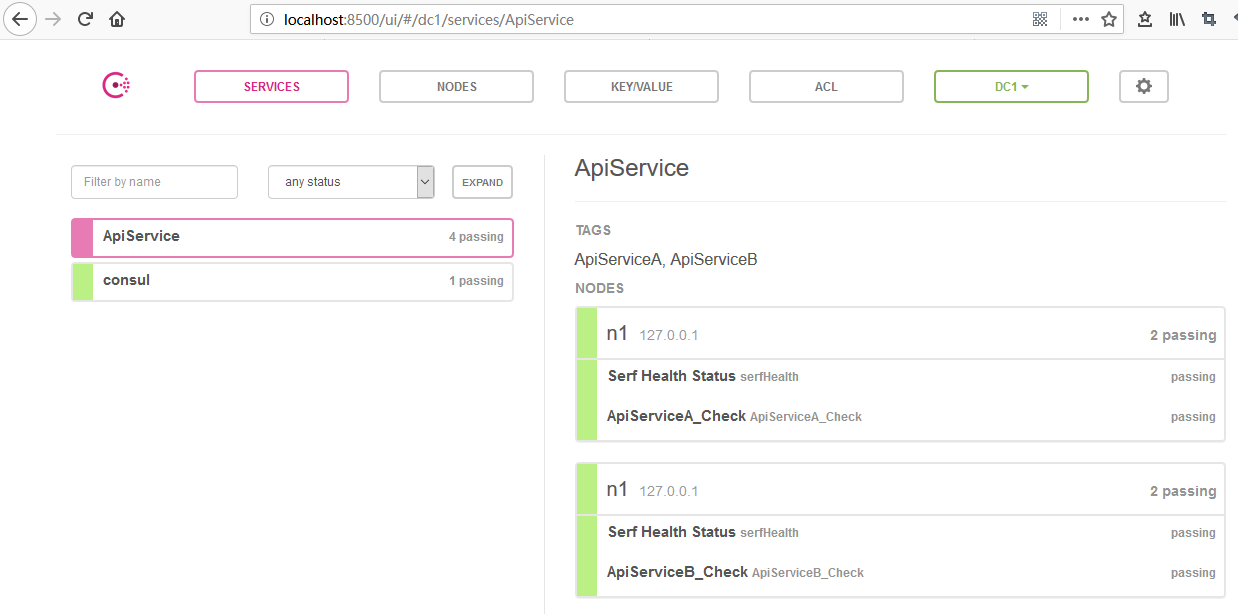
由于ApiServiceA、ApiServiceB是在一台机器上两个服务做负载 所以在一个Consul里配置了两个name一样的服务。
如果用两个机器做ApiServiceA负载,本机IP是192.168.0.5,另一台IP是192.168.0.6上,以本机上主Consul
本机 0.5 Consul配置如下:
```
{
"encrypt": "7TnJPB4lKtjEcCWWjN6jSA==",
"services": [
{
"id": "ApiServiceA",
"name": "ApiService",
"tags": [ "ApiServiceA" ],
"address": "192.168.0.5",
"port": 5011,
"checks": [
{
"id": "ApiServiceA_Check",
"name": "ApiServiceA_Check",
"http": "http://192.168.0.5:5011/health",
"interval": "10s",
"tls_skip_verify": false,
"method": "GET",
"timeout": "1s"
}
]
}
]
}
```
把ApiServiceA和Consul拷到另一个0.6机器,修改Consul配置文件
```
{
"encrypt": "7TnJPB4lKtjEcCWWjN6jSA==",
"services": [
{
"id": "ApiServiceA",
"name": "ApiService",
"tags": [ "ApiServiceA" ],
"address": "192.168.0.6",
"port": 5011,
"checks": [
{
"id": "ApiServiceA_Check",
"name": "ApiServiceA_Check",
"http": "http://192.168.0.6:5011/health",
"interval": "10s",
"tls_skip_verify": false,
"method": "GET",
"timeout": "1s"
}
]
}
]
}
```
修改启动Consul脚本的IP为192.168.0.6,-node=n2,去掉 -bootstrap,启动Consul,在Consul UI下查看服务是否正常
在192.168.0.5下,把192.168.0.6加到集群中,命令如下:
```
consul join 192.168.0.6
```
注意,consul集群中,consul配置文件中的encrypt,一定要相同,否则无法放加入同一个集群
用consul operator raft list-peers查看状态,会发现n1,n2在一个集群中了
```
Node ID Address State Voter RaftProtocol
n1 d02c3cd0-d9c8-705b-283e-121a9105cf52 192.168.0.5:8300 leader true 3
n2 efe954ce-9840-5c66-fa80-b9022167d782 192.168.0.6:8300 follower true 3
```
2、配置Ocelot,加入Consul,启用服务健康检查,负载均衡
打开 Snai.ApiGateway 网关下的Ocelot.json文件,加入下面配置
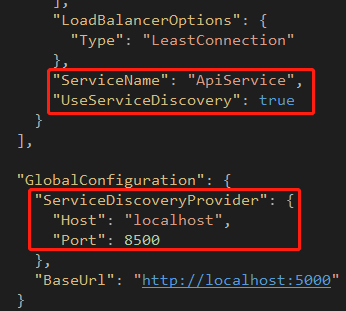
ServiceName 是Cousul配置中服务的name名字
UseServiceDiscovery 是否启用Consul服务发现
ServiceDiscoveryProvider 是Consul服务发现的地址和端口
重新生成启动Ocelot网关,到此Ocelot+Consul配置完成
**三、运行测试Ocelot+Consul服务发现、负载均衡**
打开 http://localhost:5000/apiservice/values 地址,刷新页面负载得到ServiceA,ServiceB返回内容


当把ApiServiceB服务关掉,再多次刷新页面,只能得到ServiceA的内容


打开Consul UI去看,ServiceB健康检查失败

Ocolot+Consul实现API网关 服务注册、服务发现、健康检查和负载均衡已完成
Github源码地址:[https://github.com/Liu-Alan/Ocelot-Consul](https://github.com/Liu-Alan/Ocelot-Consul)